How to connect your CGM with Gurucose?
Find simple steps to connect your CGM to Gurucose App.
Welcome to Gurucose!
Your journey to better diabetes management starts here. With Gurucose, you can easily track and understand your glucose levels using data from your CGM (Continuous Glucose Monitor). Let’s get started on connecting your sensor and unlocking all those amazing insights!
Steps to Connect Your CGM
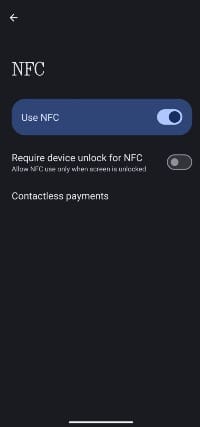
Step 1: Check Your Phone’s NFC
Before we begin, make sure your phone has NFC (Near Field Communication) capability. It is like a secret handshake between your phone and the CGM sensor.
- Turn NFC ON:
- On Android: Go to Settings > Connection Preferences > NFC, and toggle it on.
- On iPhone: NFC is enabled automatically, so you’re already good to go!
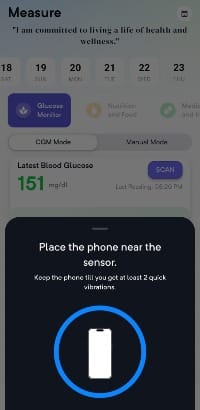
Step 2: Fire Up the Gurucose App
- Open the app and tap on the Scan button. (We’ve added image for easy reference)
- Now, place your phone’s NFC area (usually near the top) close to the sensor. Feel that little vibration? That’s your phone saying, “Got it!”
Step 3: Activate Your Sensor
A message may pop up:
“New Sensor Detected. Do you wish to switch to a new one?”
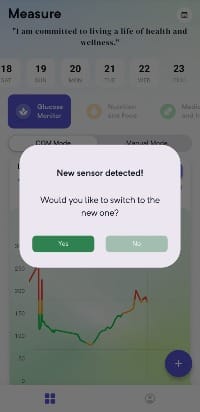
Tap Yes, then scan again to activate the sensor.
Once activated, the sensor needs some warm-up time (15 minutes to an hour) before showing glucose readings.
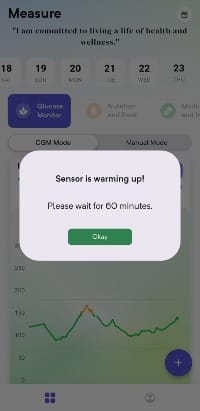
Step 4: Let the Sensor Warm Up
- After waiting a bit, scan the sensor again.
- If you see “New sensor detected,” click OK and scan one more time.
Step 5: Start Monitoring!
Once the warm-up is complete, you’ll see your glucose readings pop up in the app. Now you’re all set to track, monitor, and take charge of your health!
That’s it! Stay empowered, stay healthy, and remember, Gurucose is here to support you every step of the way.
Have a great day!